How are you doing? Keeping well I hope…I’ve finally managed to finish this blog post which I started some time ago! I can hardly believe we are well into February already…how did that happen?!
So this post is just to document a few thoughts and samples…and might give you a little insight into part of the felting process along the way.
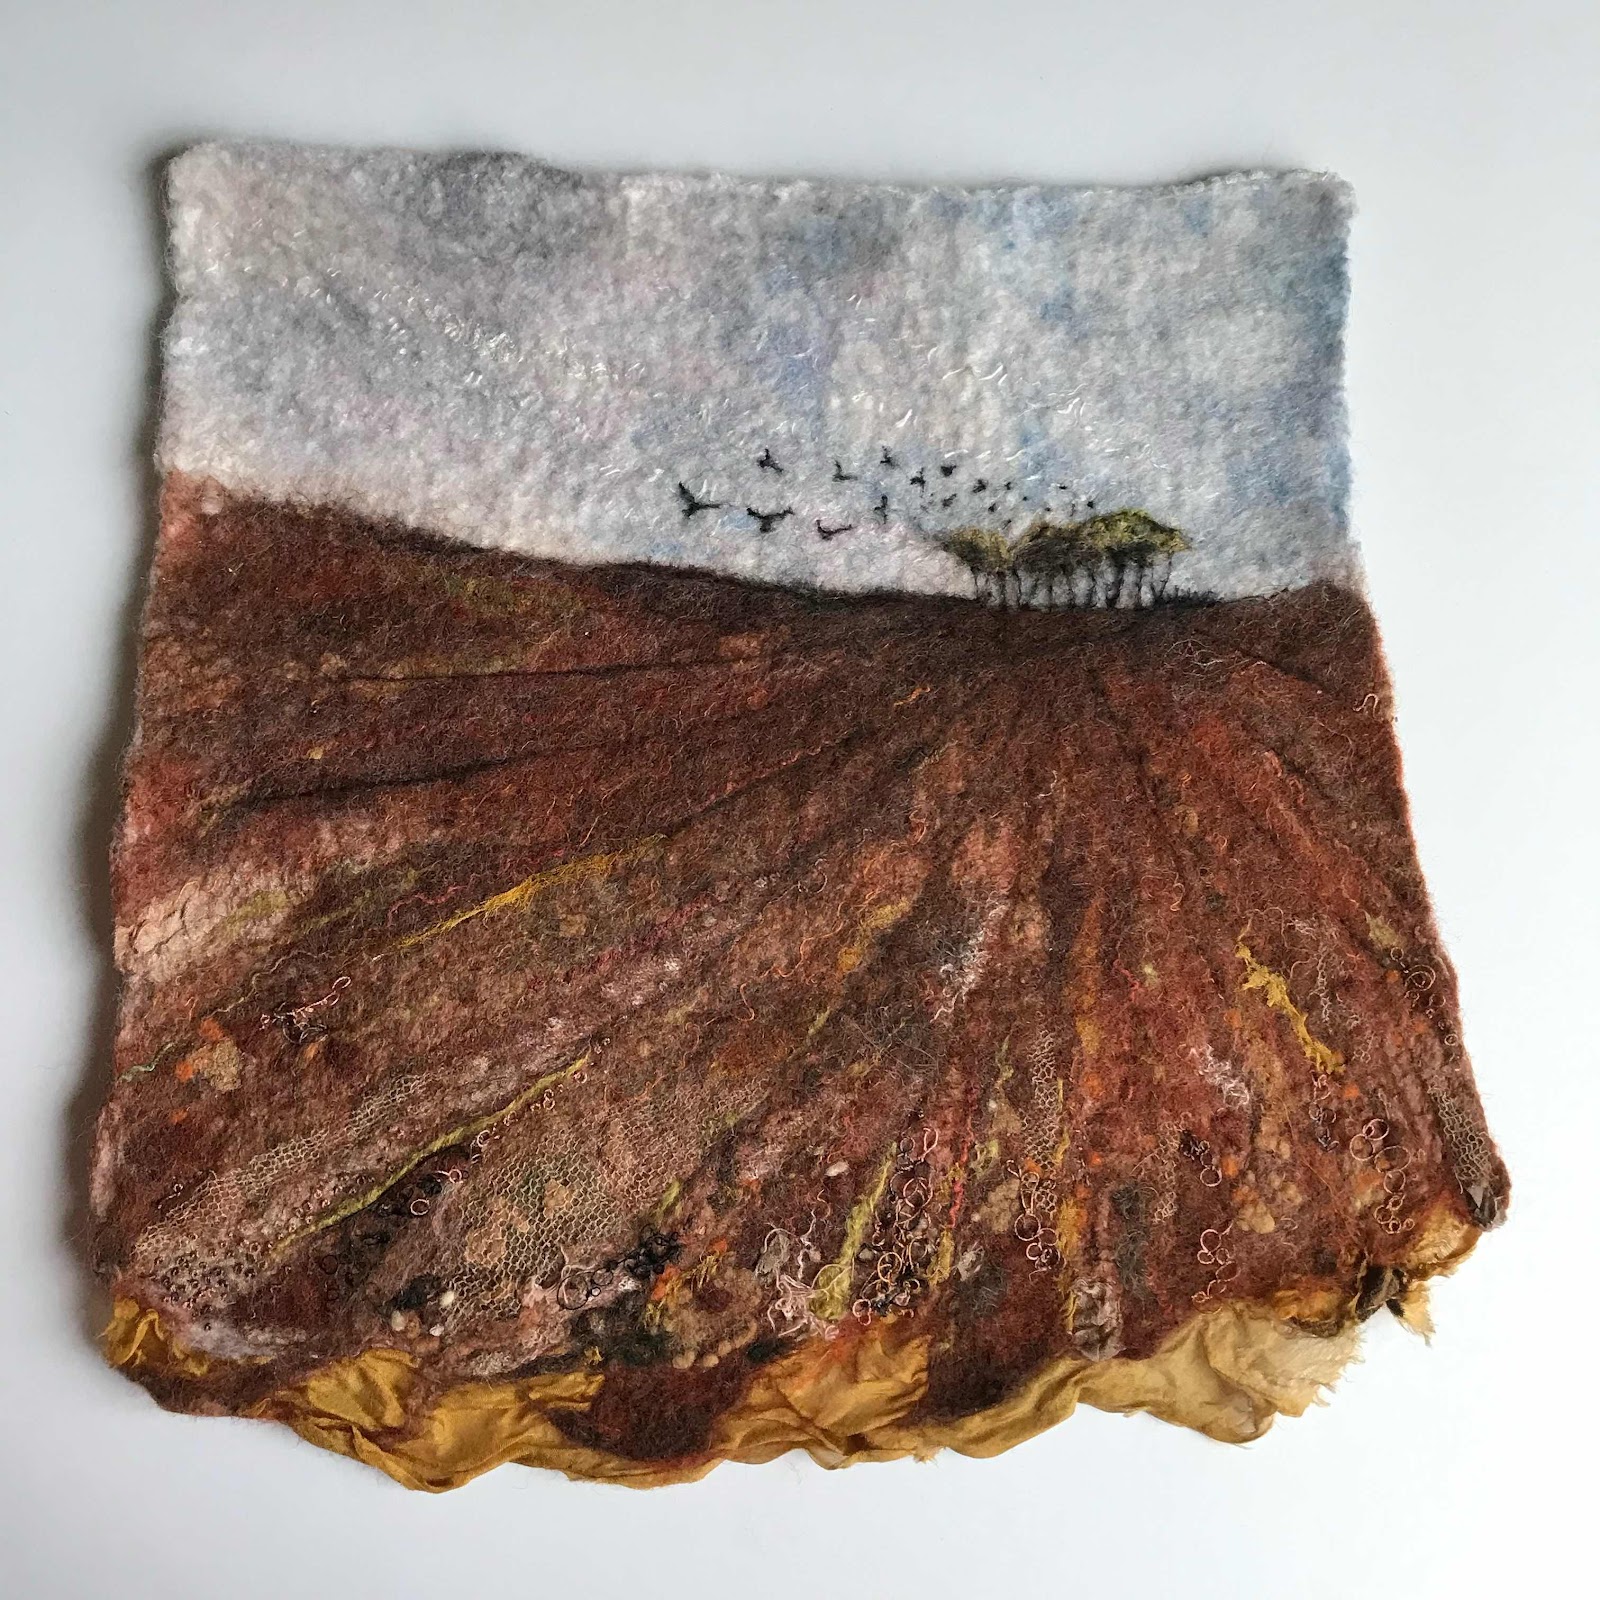
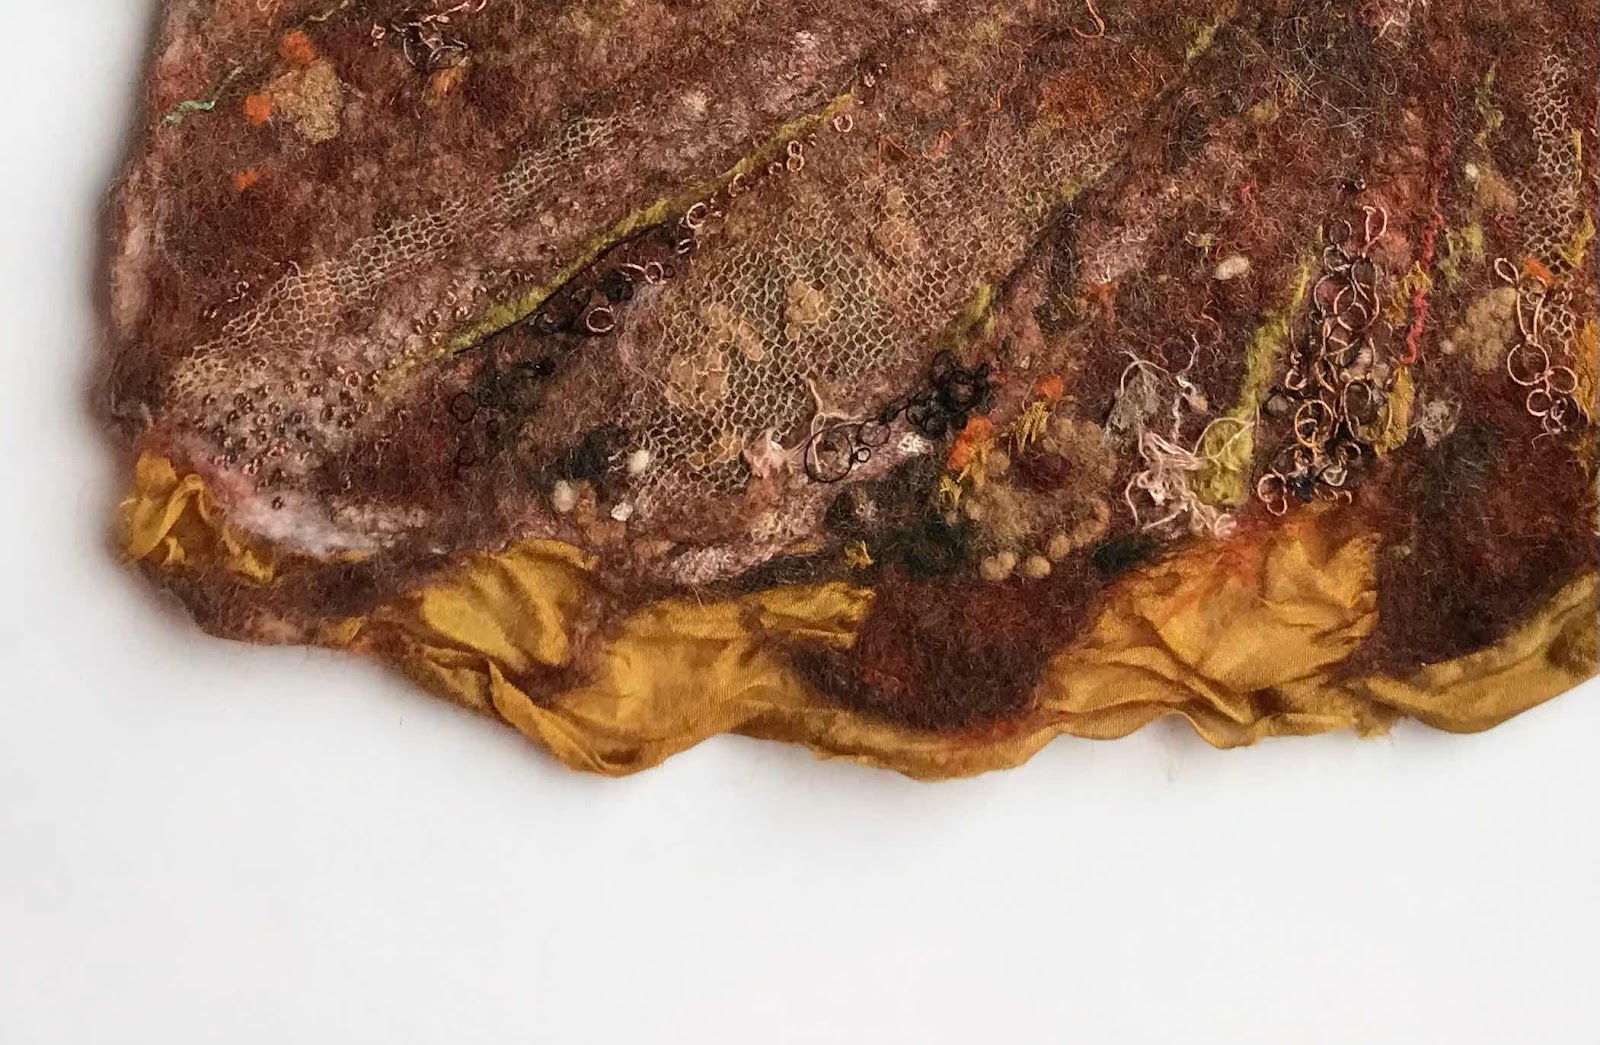
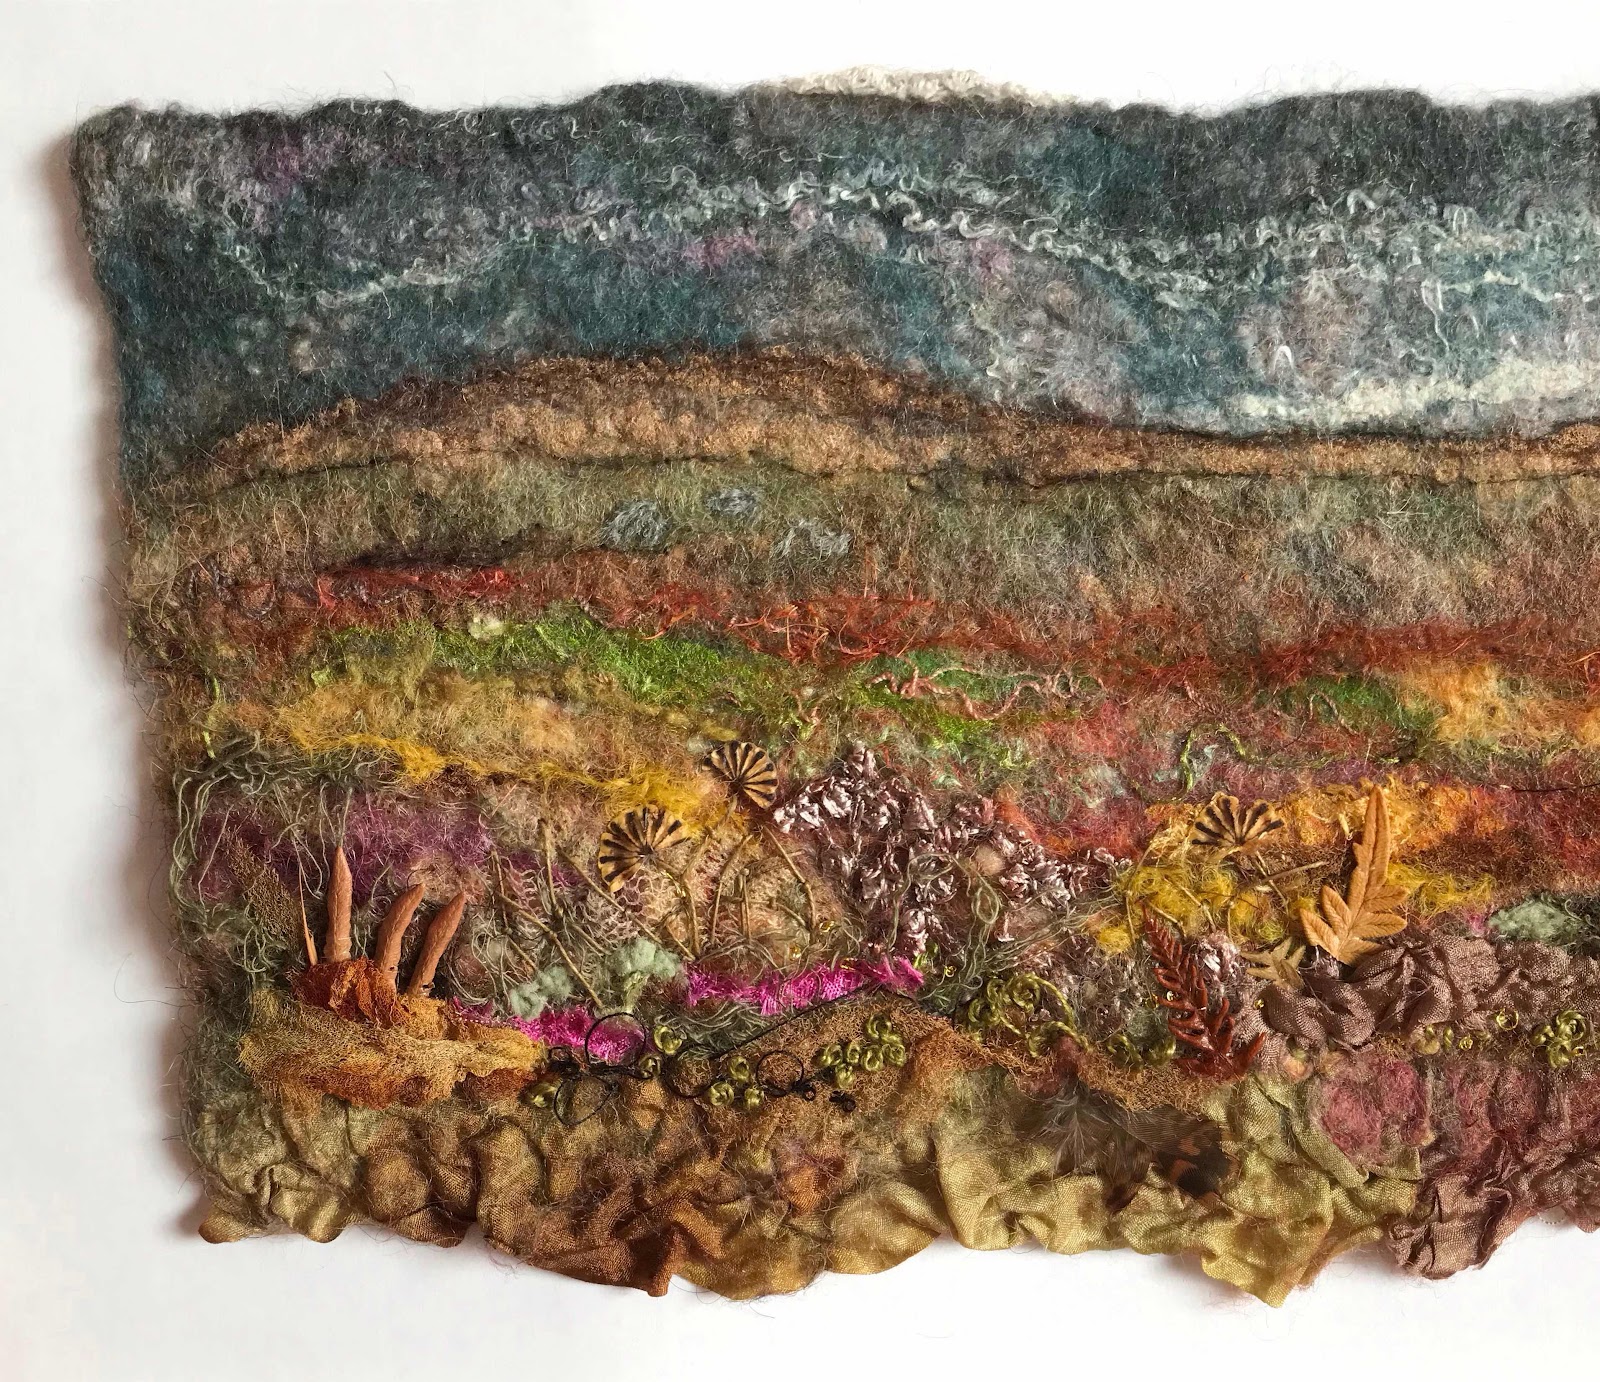
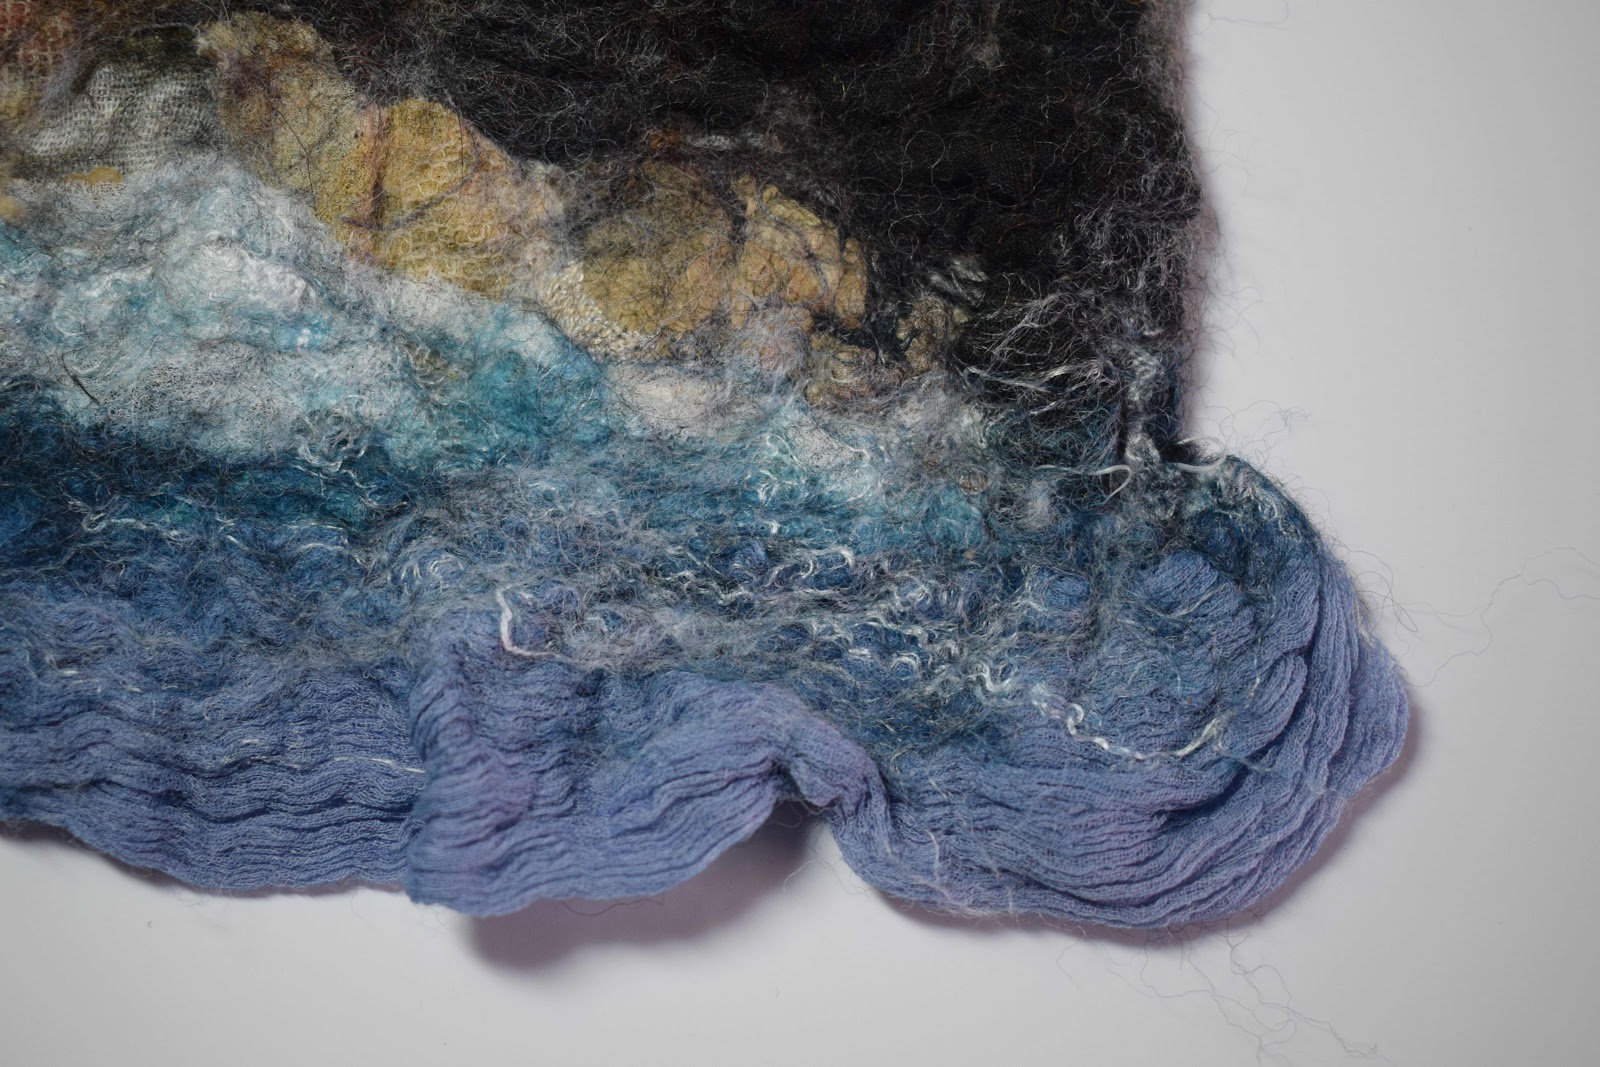
The silk at the bottom gathers with the fine fibres during the felting process. The fibres work their way through the silk fabric and as the felt shrinks the silk ruches and creates that lovely ‘skirt’ on the bottom edge.
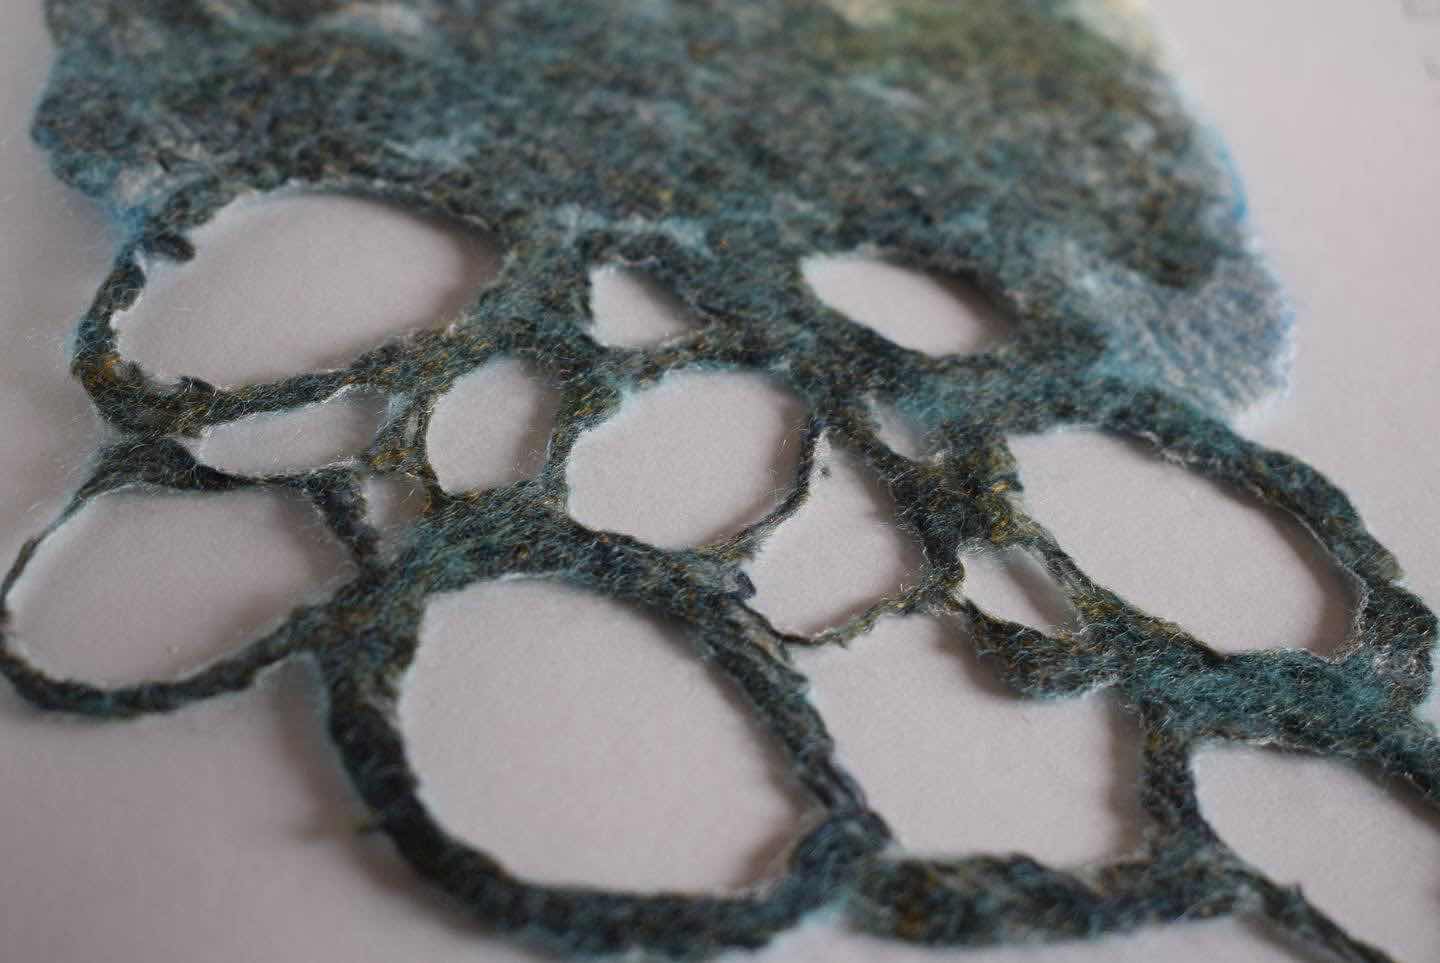
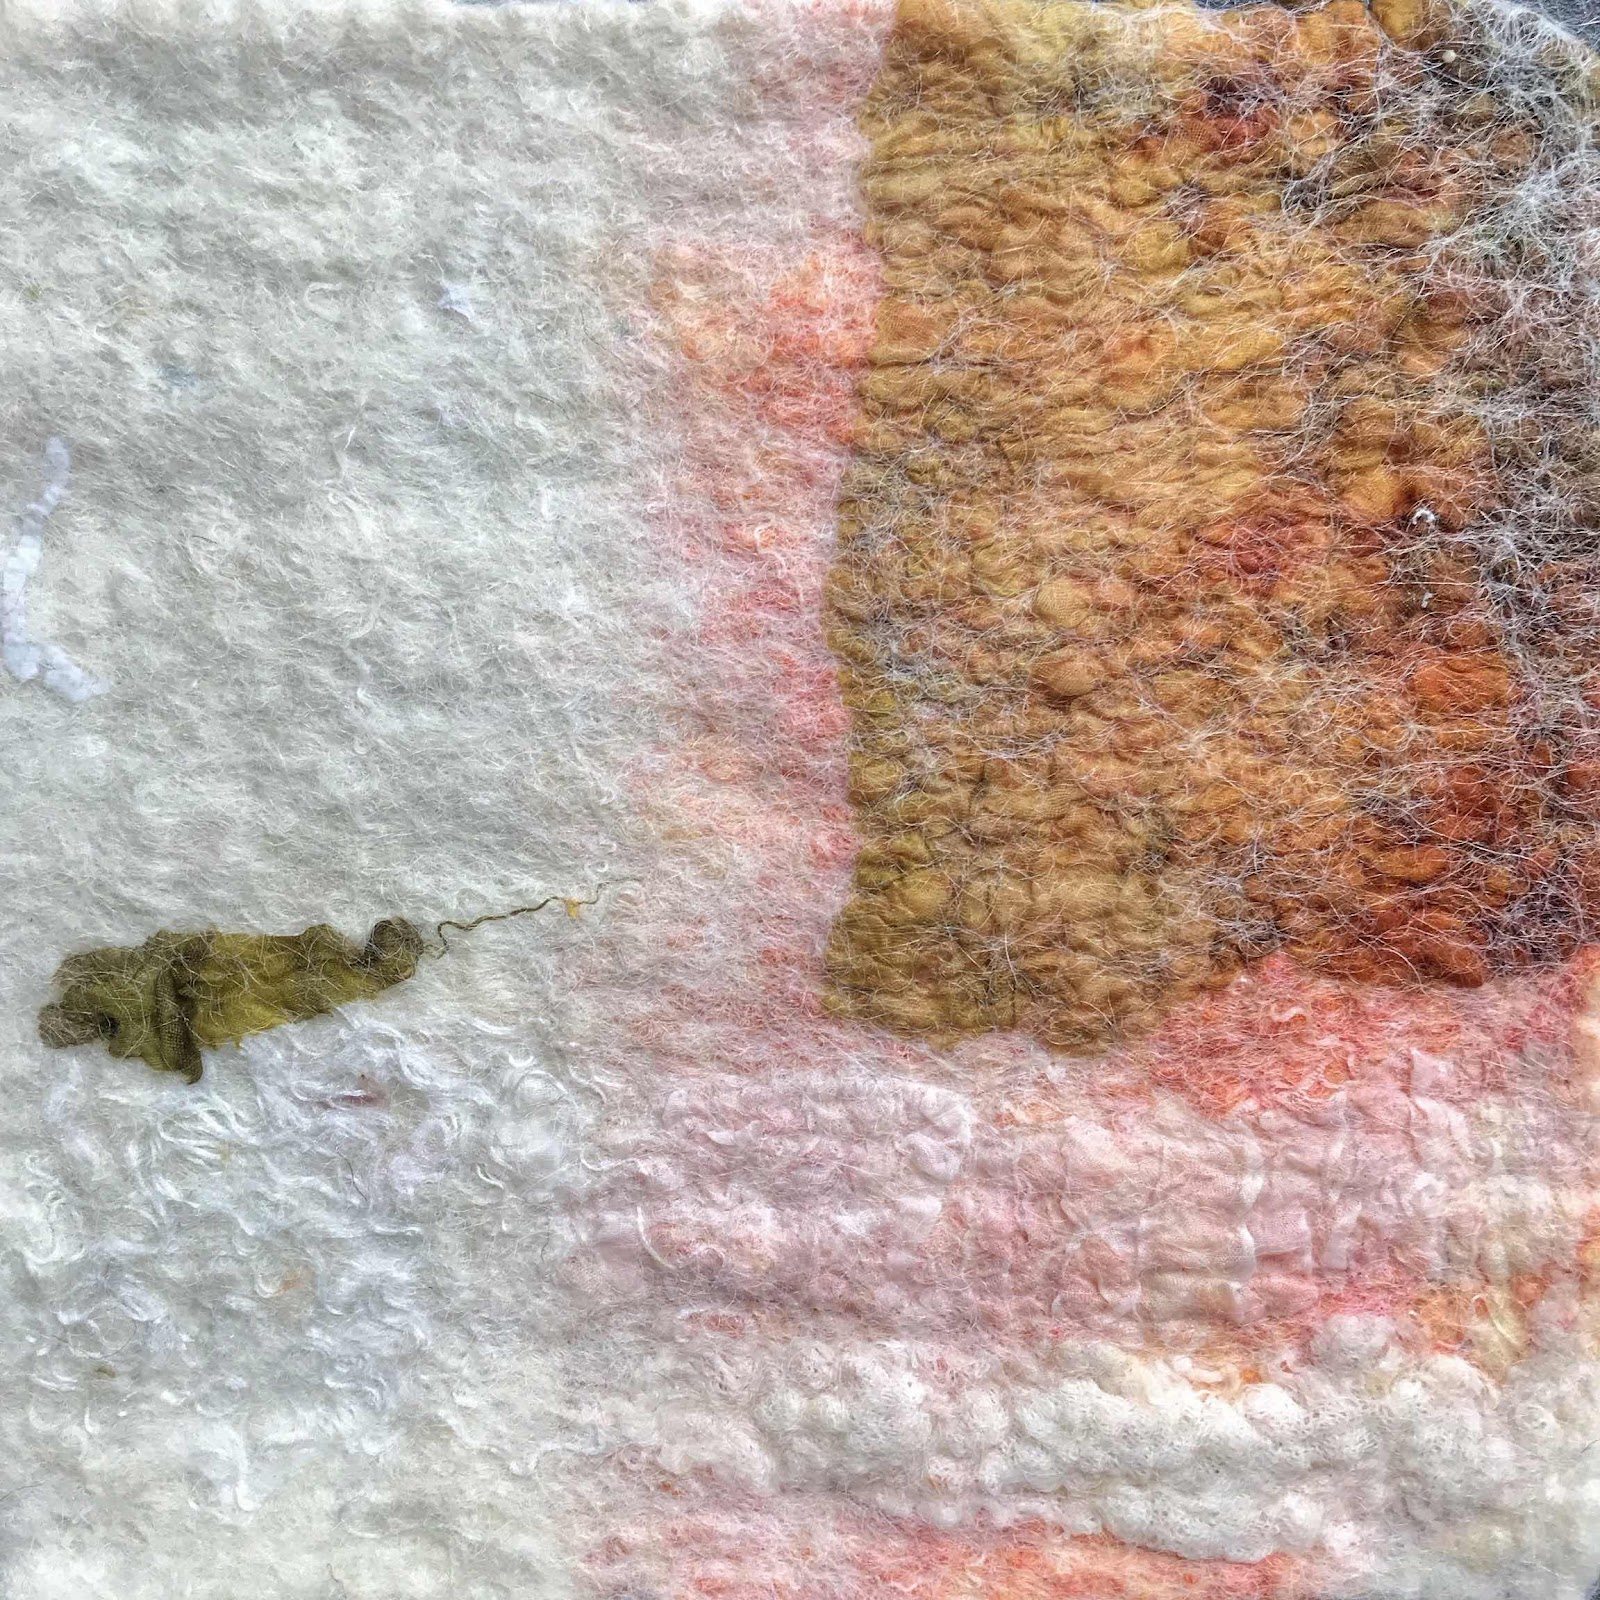
A ‘holey’ finish…a tideline perhaps? This was achieved by applying prefelted ‘rings’ onto the bottom with a silk chiffon layer underneath. Once fully felted, I snipped away the excess chiffon to leave the circles.
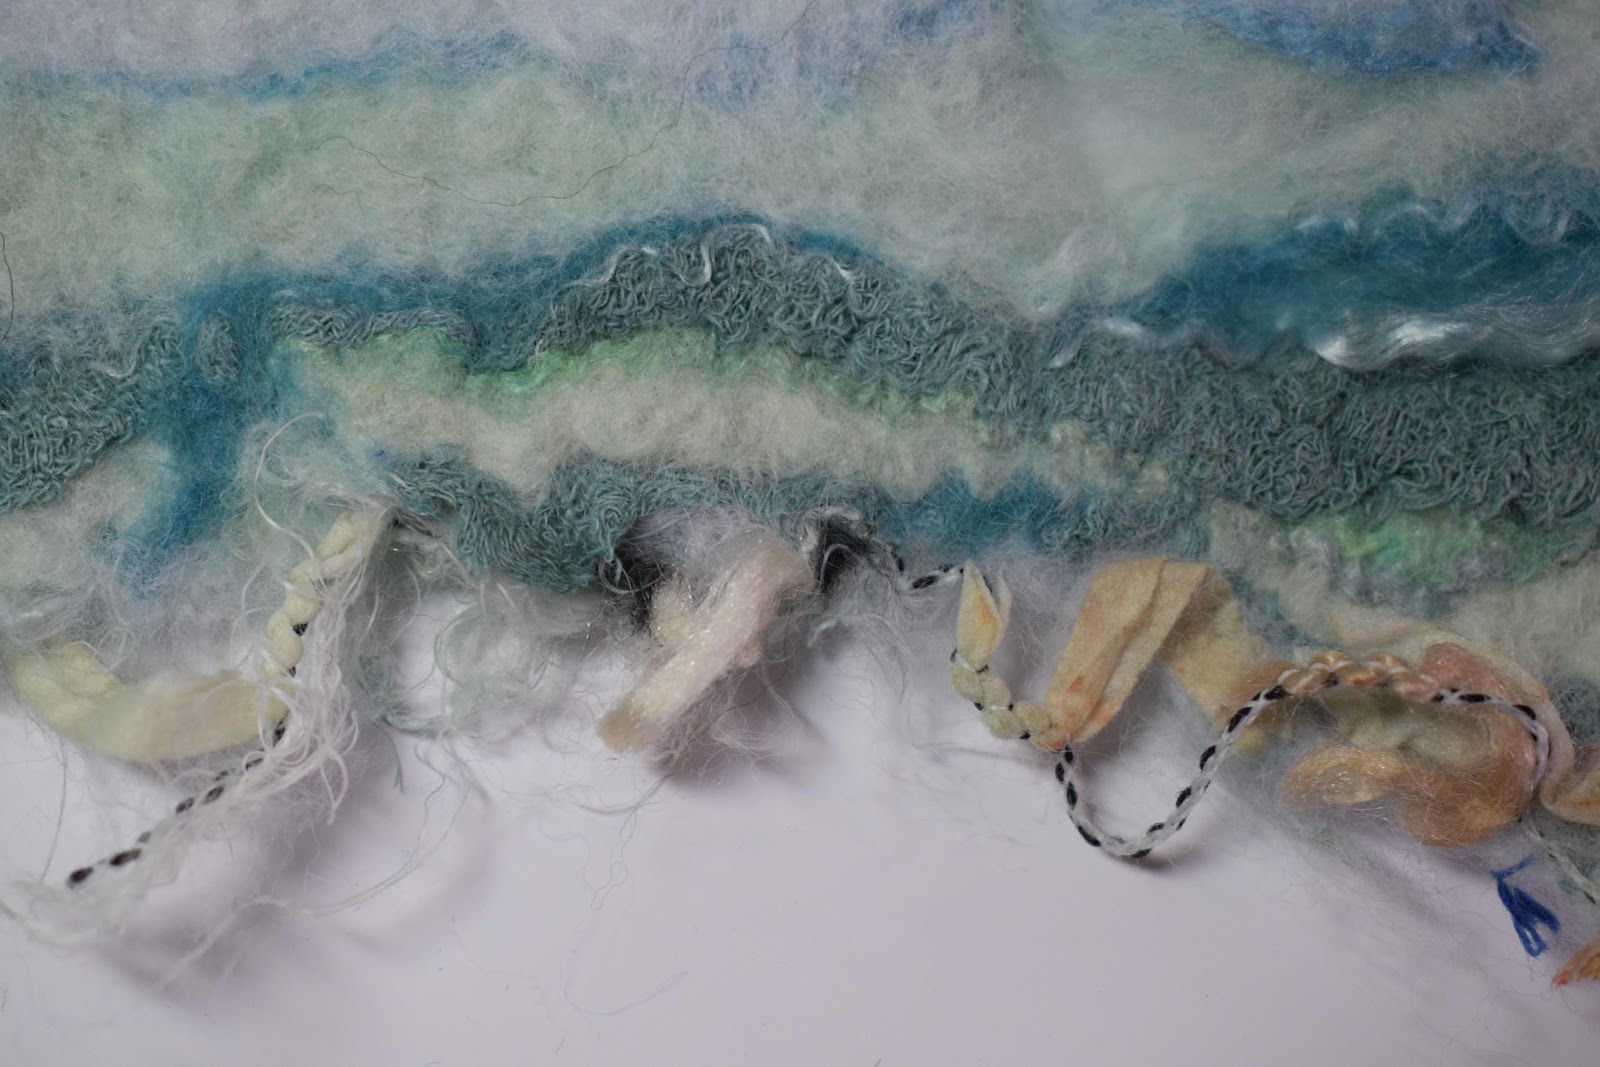
A loose, yarn border…nice way to use some of my stash of art yarns! Barely felted in to leave loops and waves along the bottom of the piece. Gives a nice organic edge…again, maybe a tideline?
This was a piece of crinkly cotton felted in along the bottom…the odd fine wool fibres latch on and gather it in places to create an undulating edge.
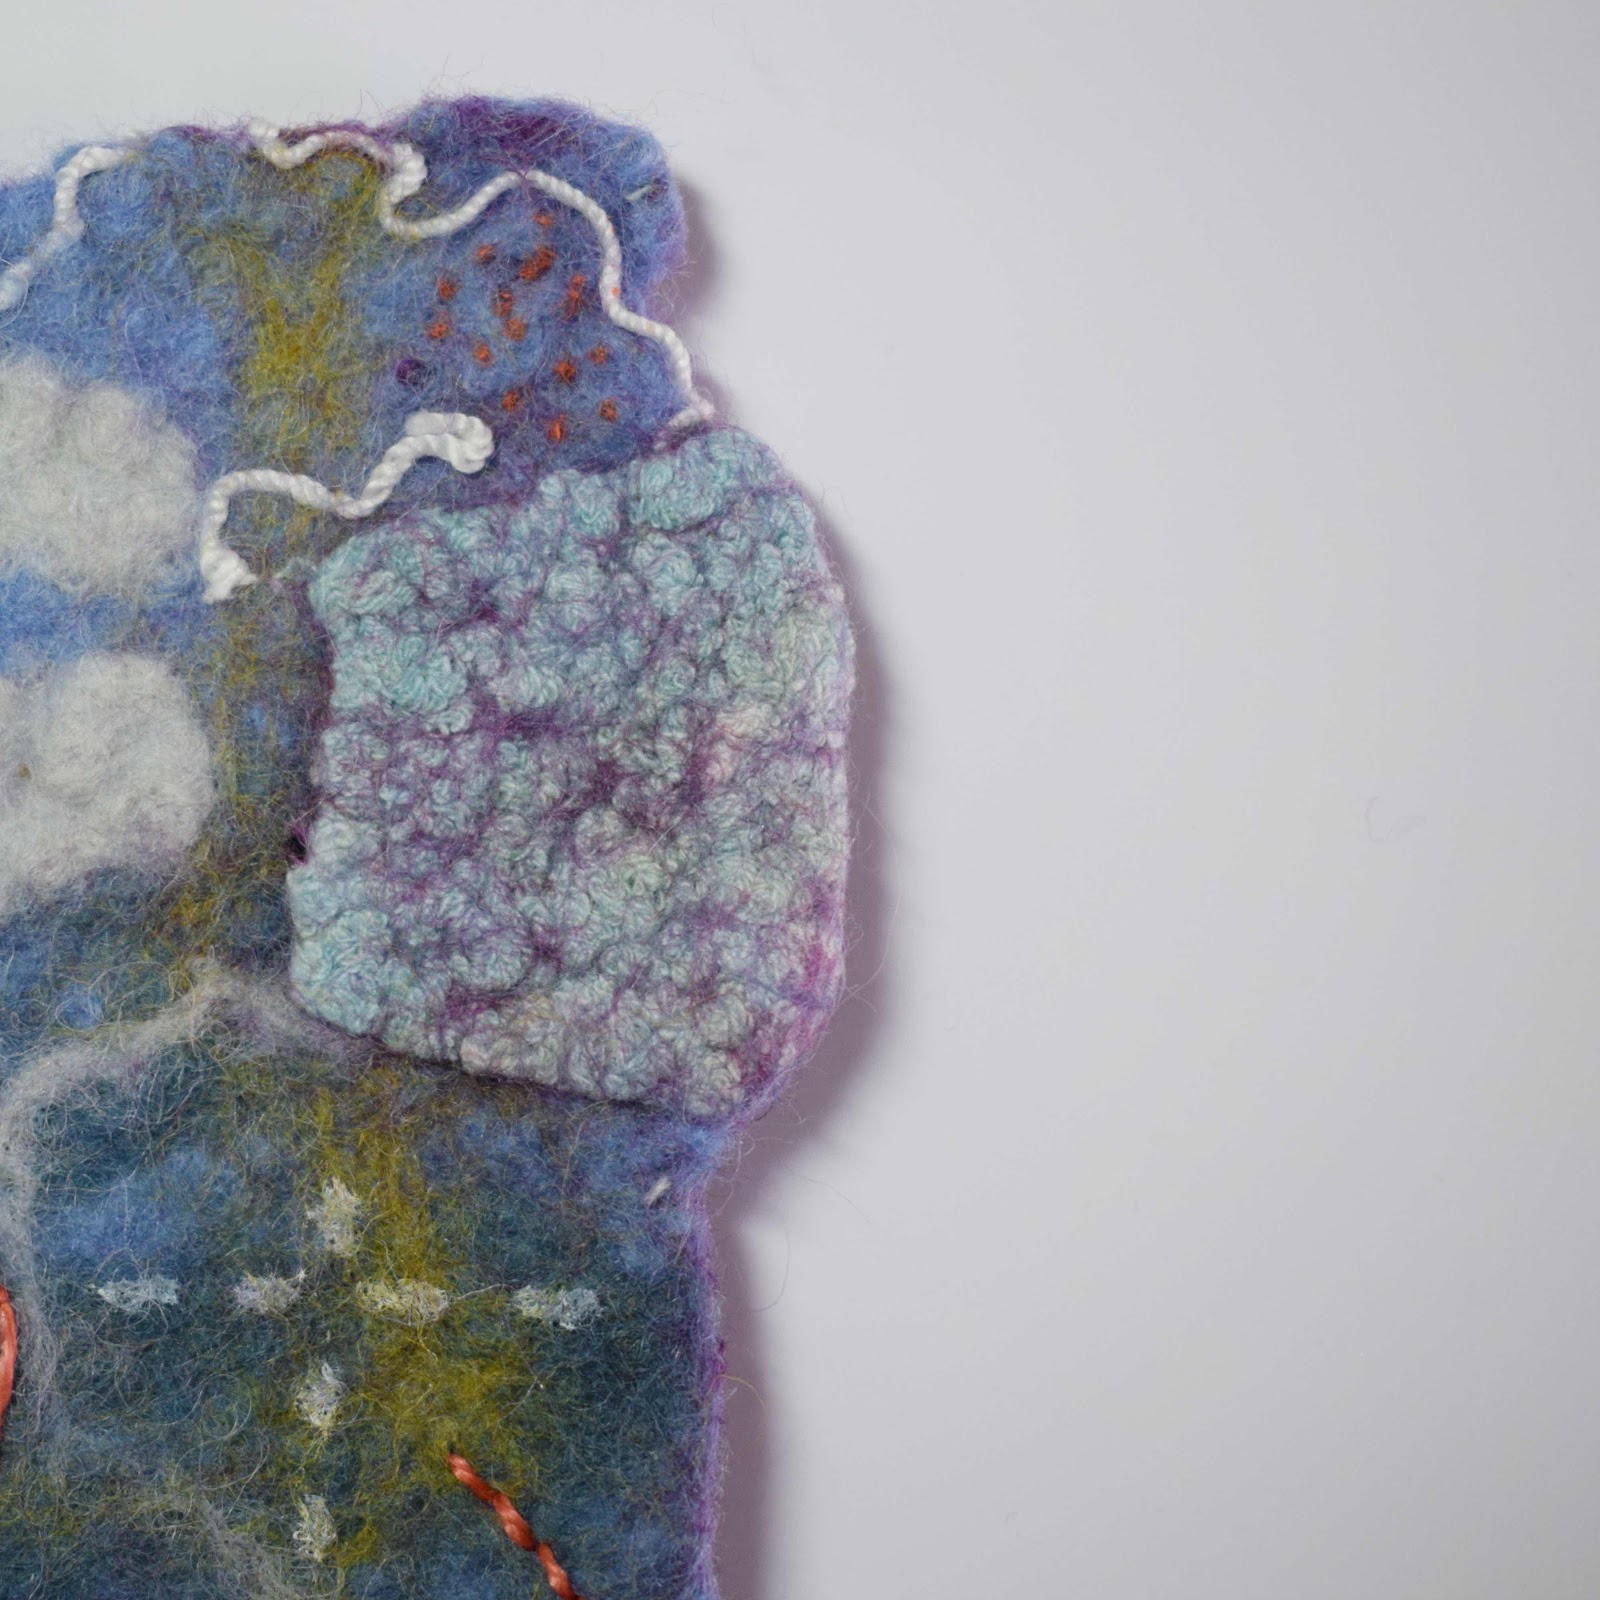
Looking at my ‘creative sparks’ squares, pieces of scrap felt added to slightly overhang the edge gives an option for a more geometric finish…maybe to give an impression of stones, boulders or cliffs, or as part of an abstract design…if placed side by side along the bottom edge, all slightly different sizes/lengths. They could even be added on any (or all) of the edges, not just the bottom. Above is a smaller piece of added felt, and there’s a longer piece in the picture below. I have a bag full of felt offcuts, and as long as you rough up the underside, it can still be incorporated into a new piece and should felt in successfully, but will stand a little proud of the main surface. That’s the great thing about felt…even the ‘failed’ pieces can be reused at some point.

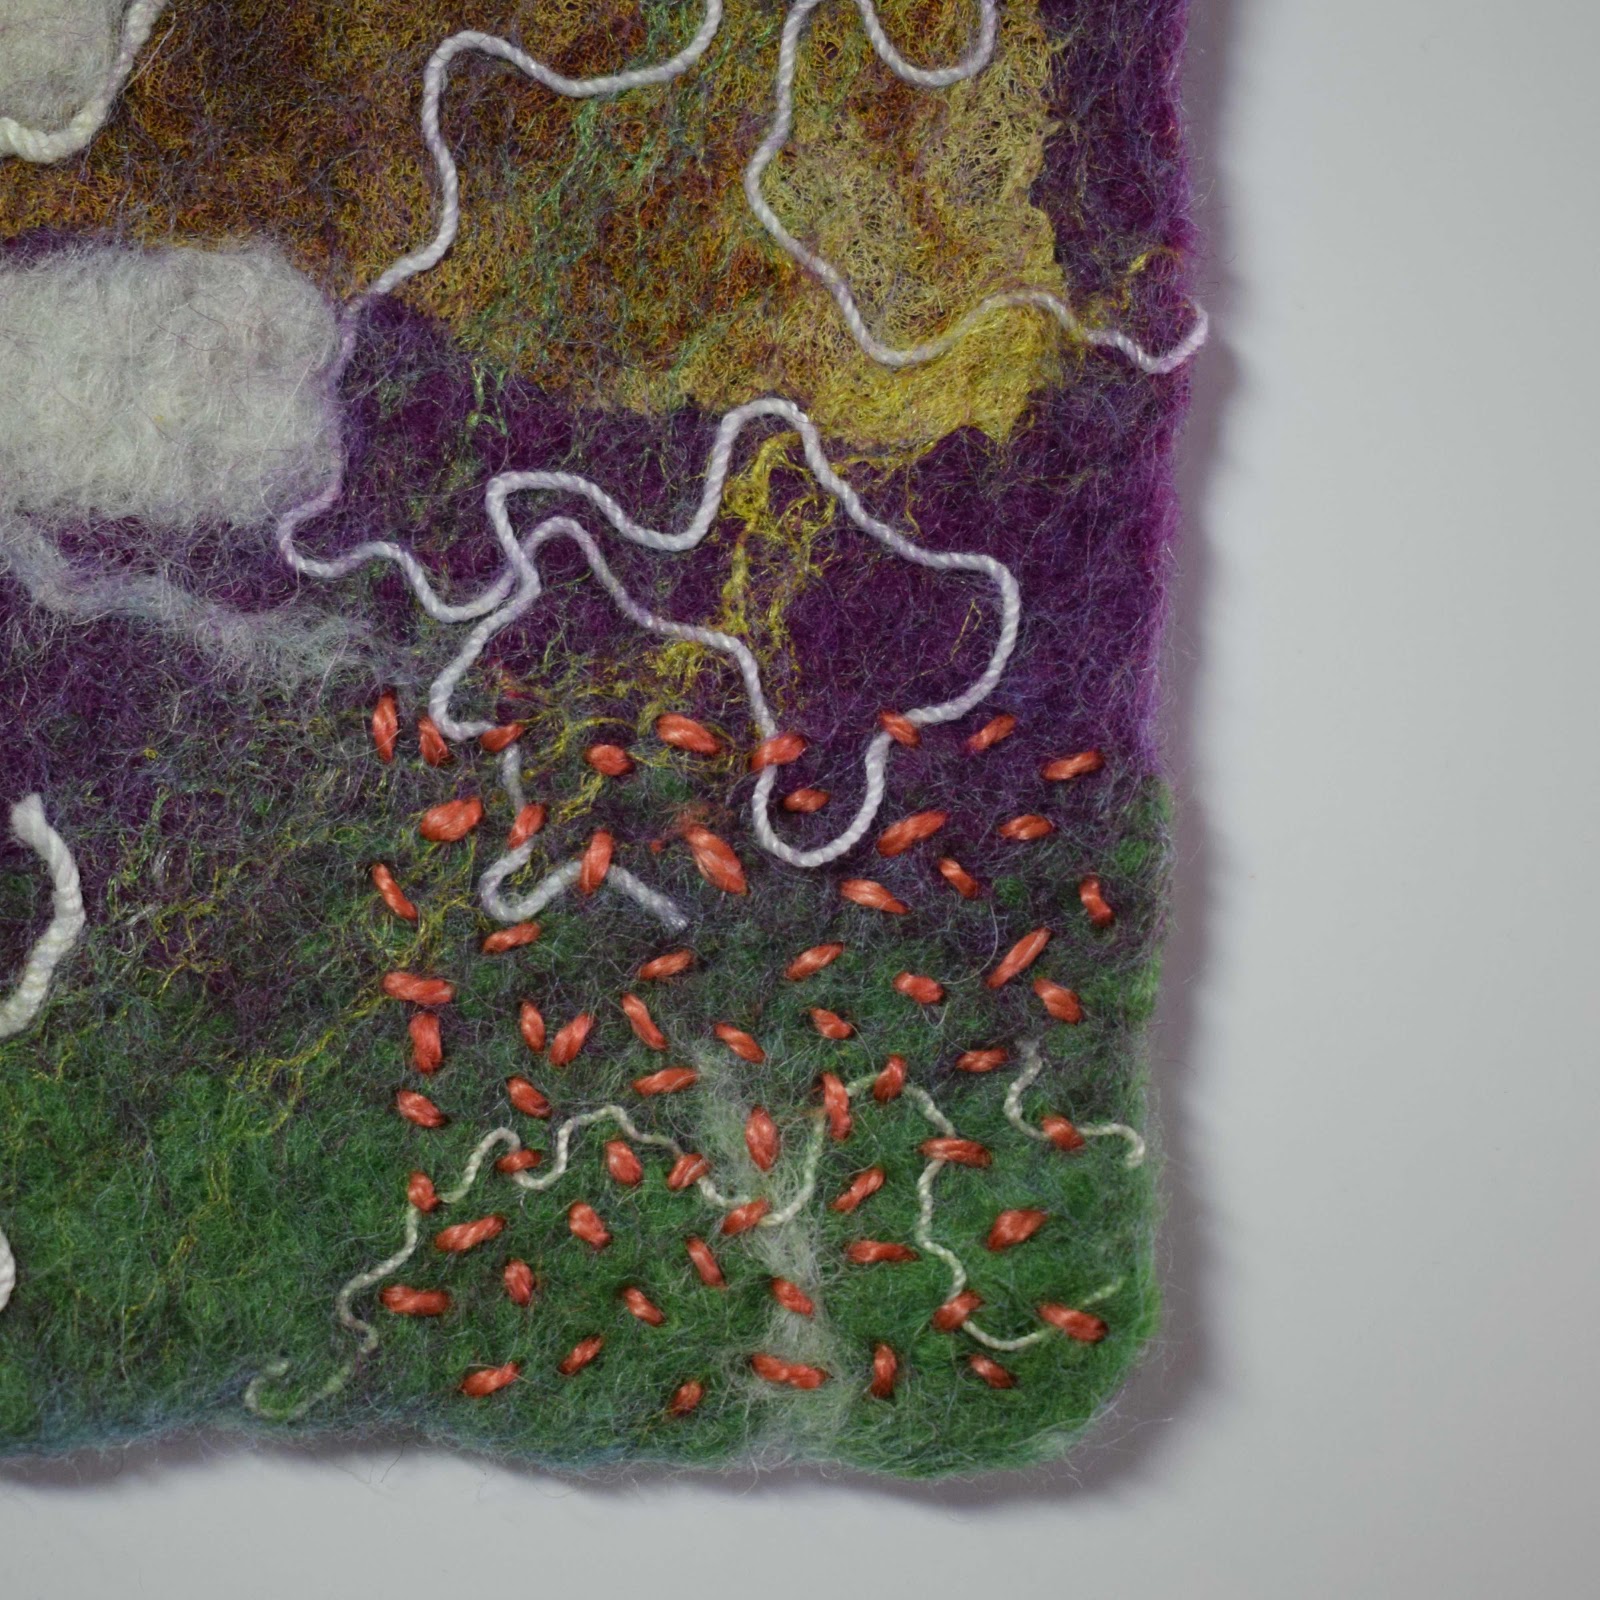
There’s also a little ‘loop’ of yarn there in the picture above…maybe that could be executed all the way along an edge? Hmm…can you hear my imagination ticking?
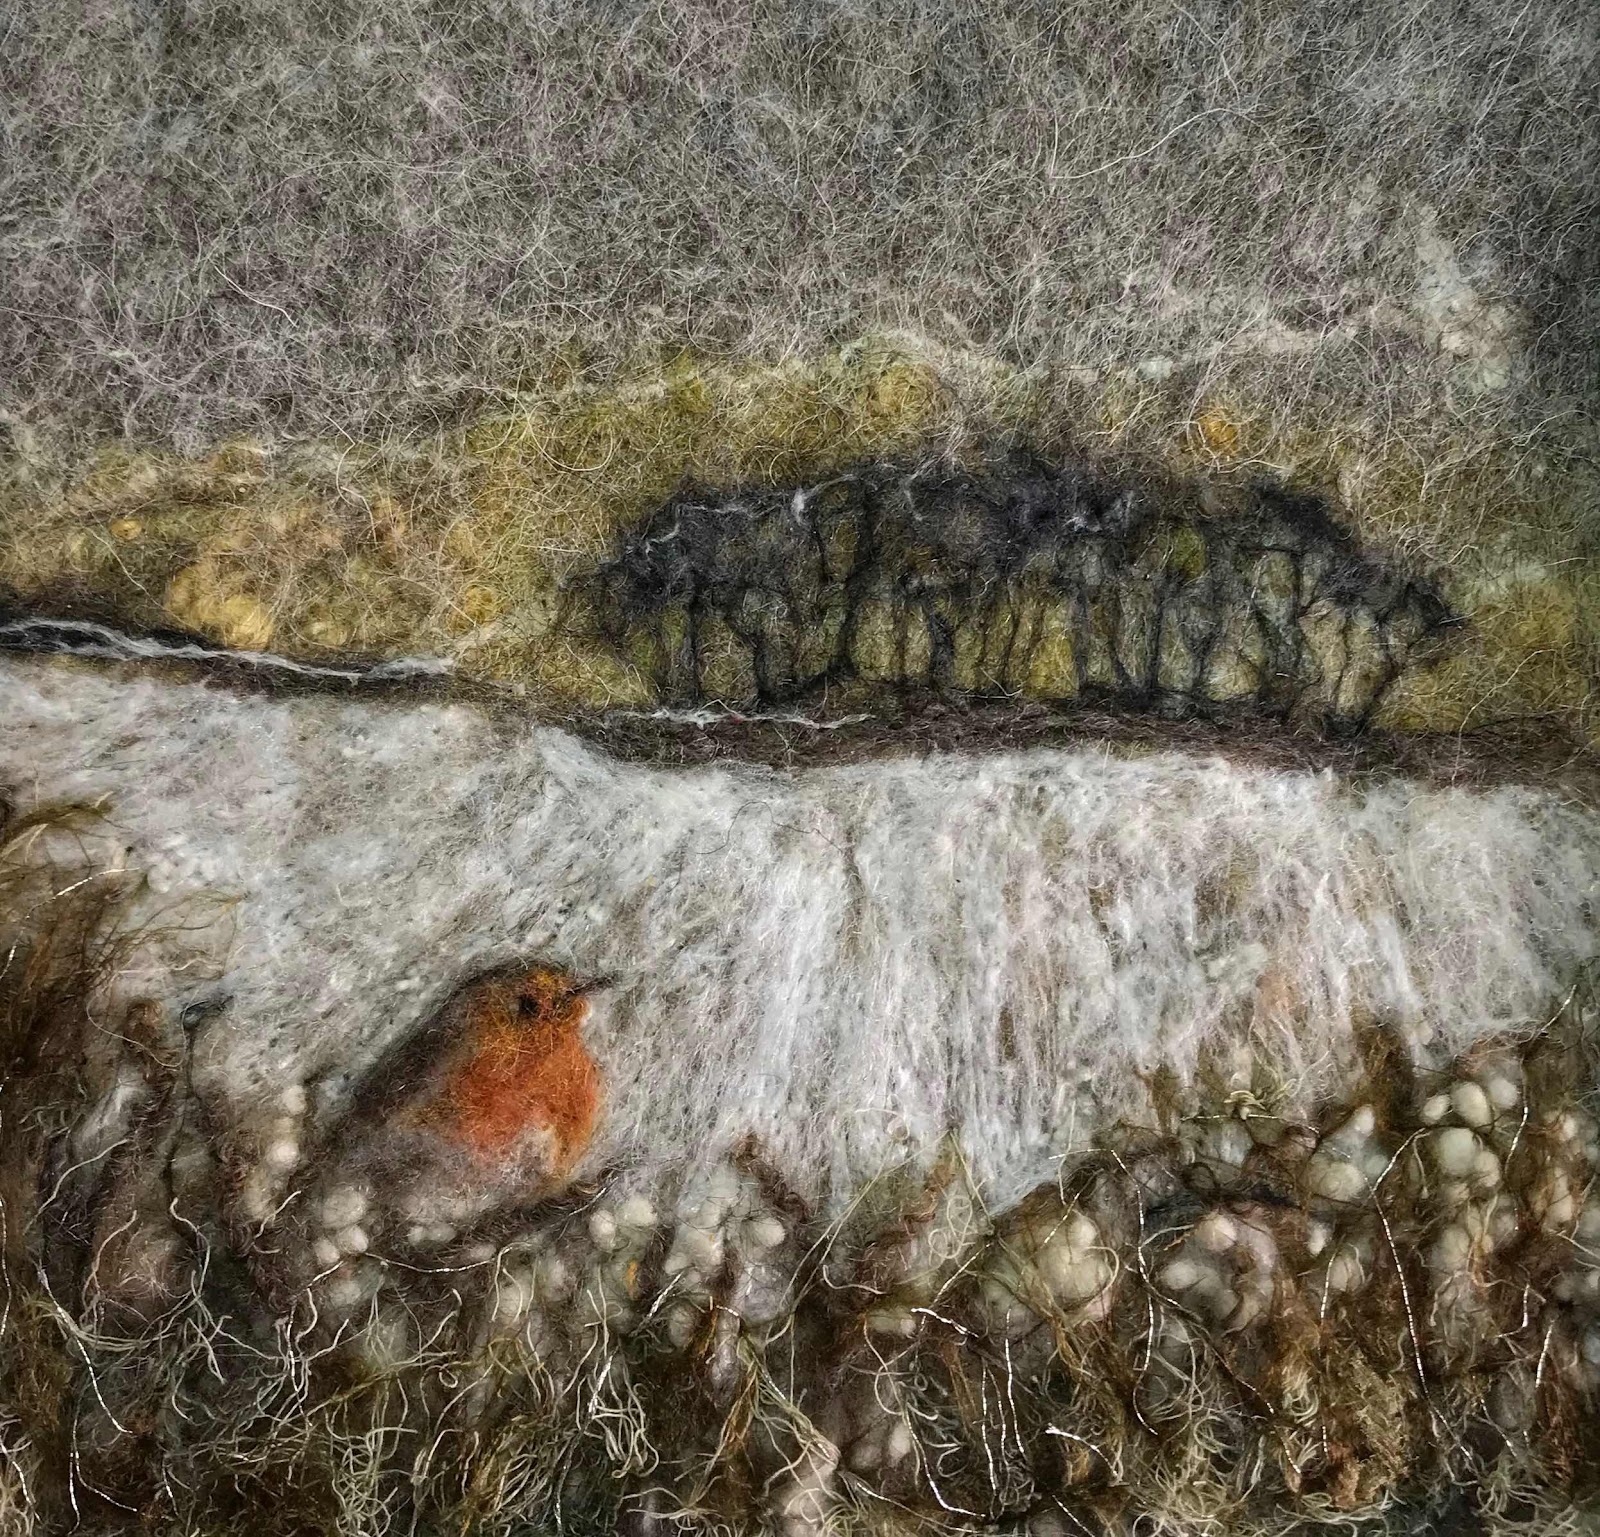
Or of course the edges can just be worked to be left really even with lovely corners…slow, careful felting enables this, and whilst the edges below aren’t entirely perfect, the overall square shape could fit neatly, without trimming, into a box frame or floating frame…maybe without glass if thoroughly felted, and displayed like a canvas
The possibilities are endless really aren’t they?
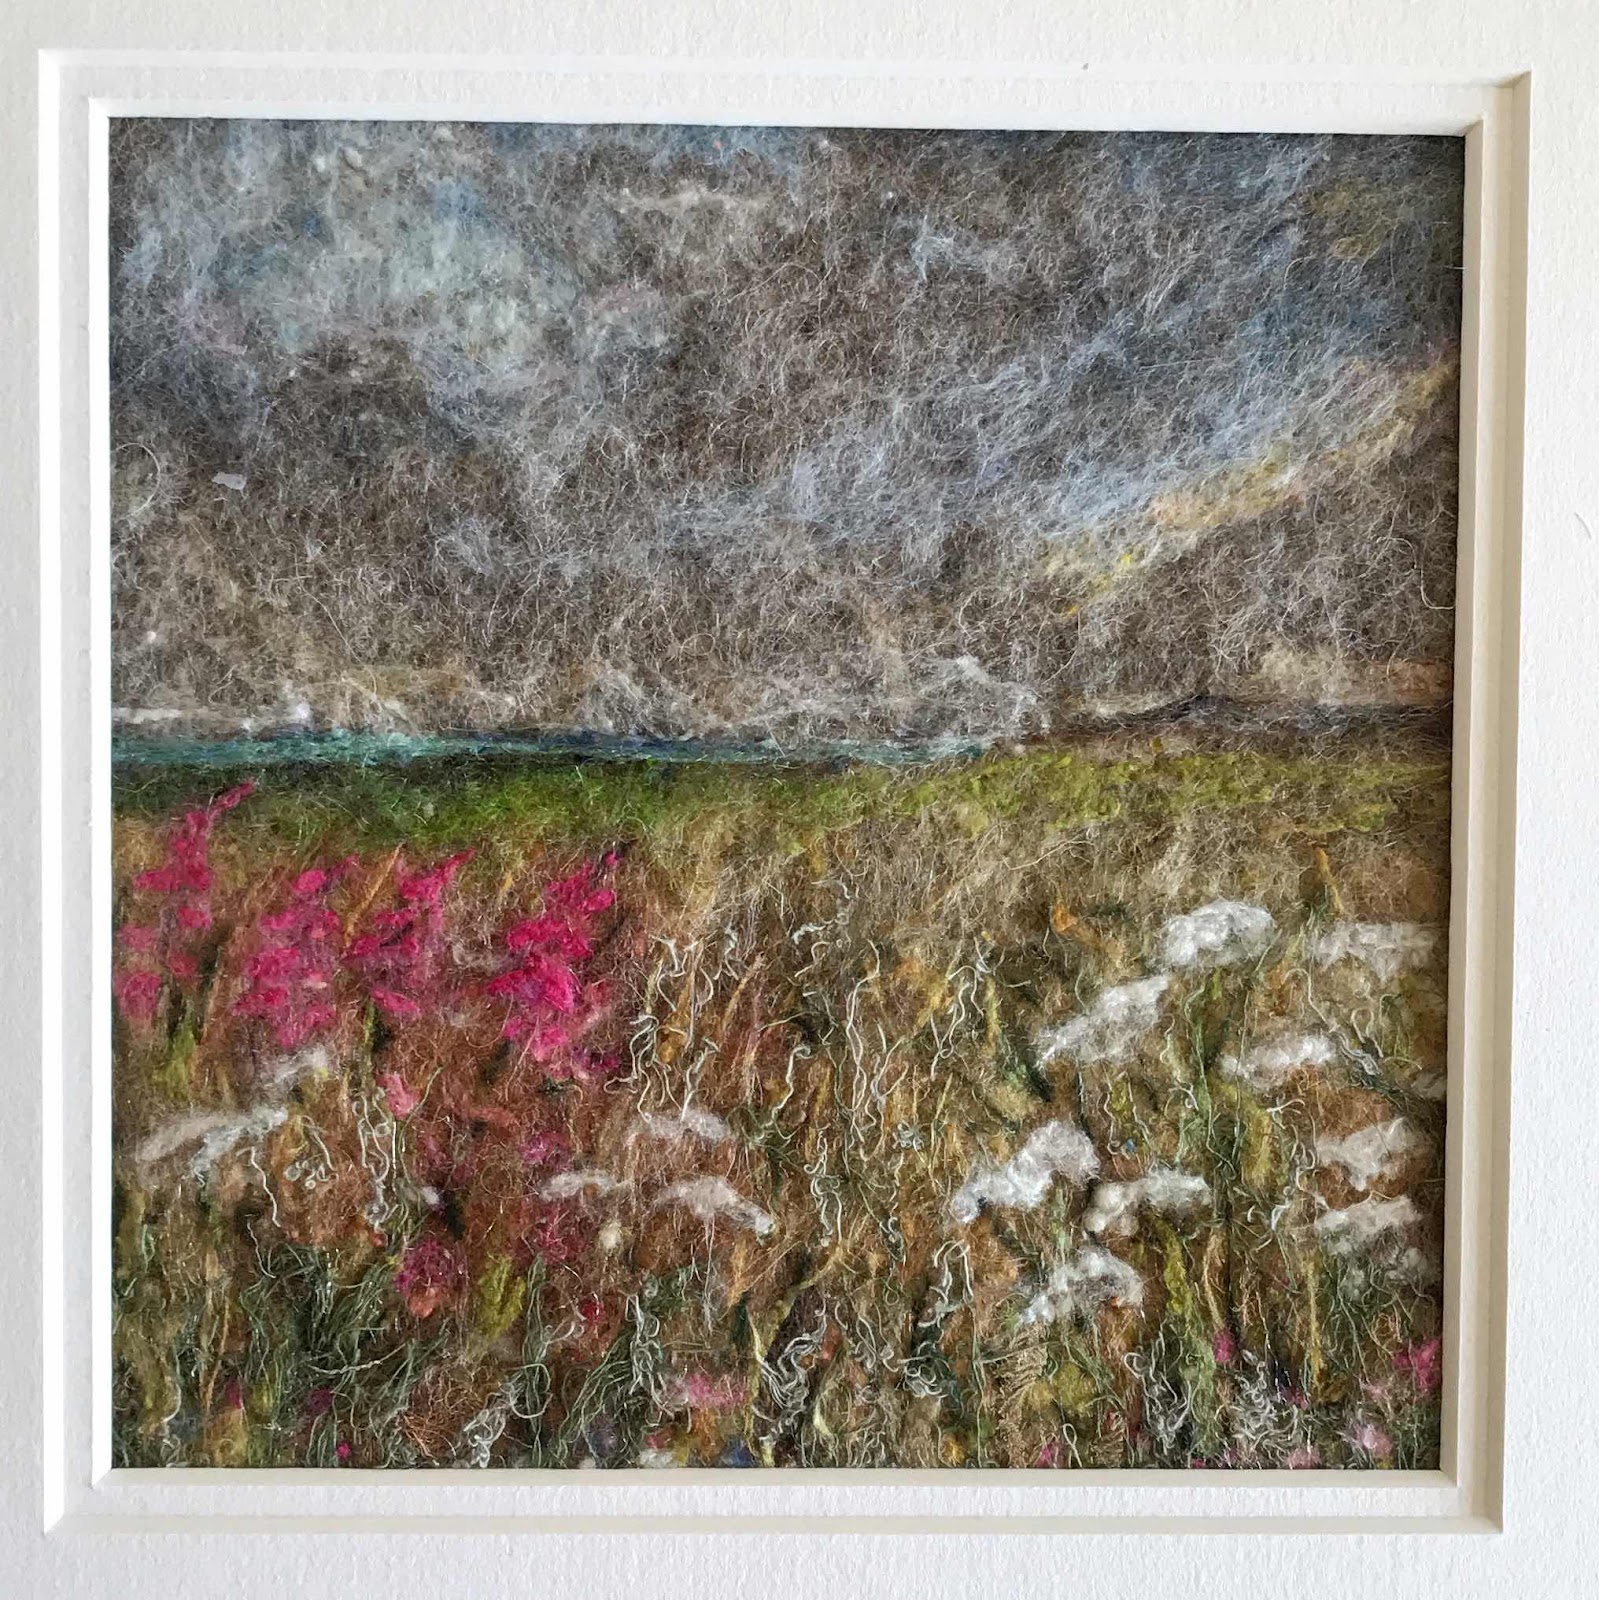
One of the things I want to explore a little further with my felting is ‘edges’. I’ve long debated whether leaving the edges of a felted picture on show within a frame hinders it from selling. Certainly, from past experience a picture with a mount seems to be preferred. However, perhaps my edges just weren’t good enough!?
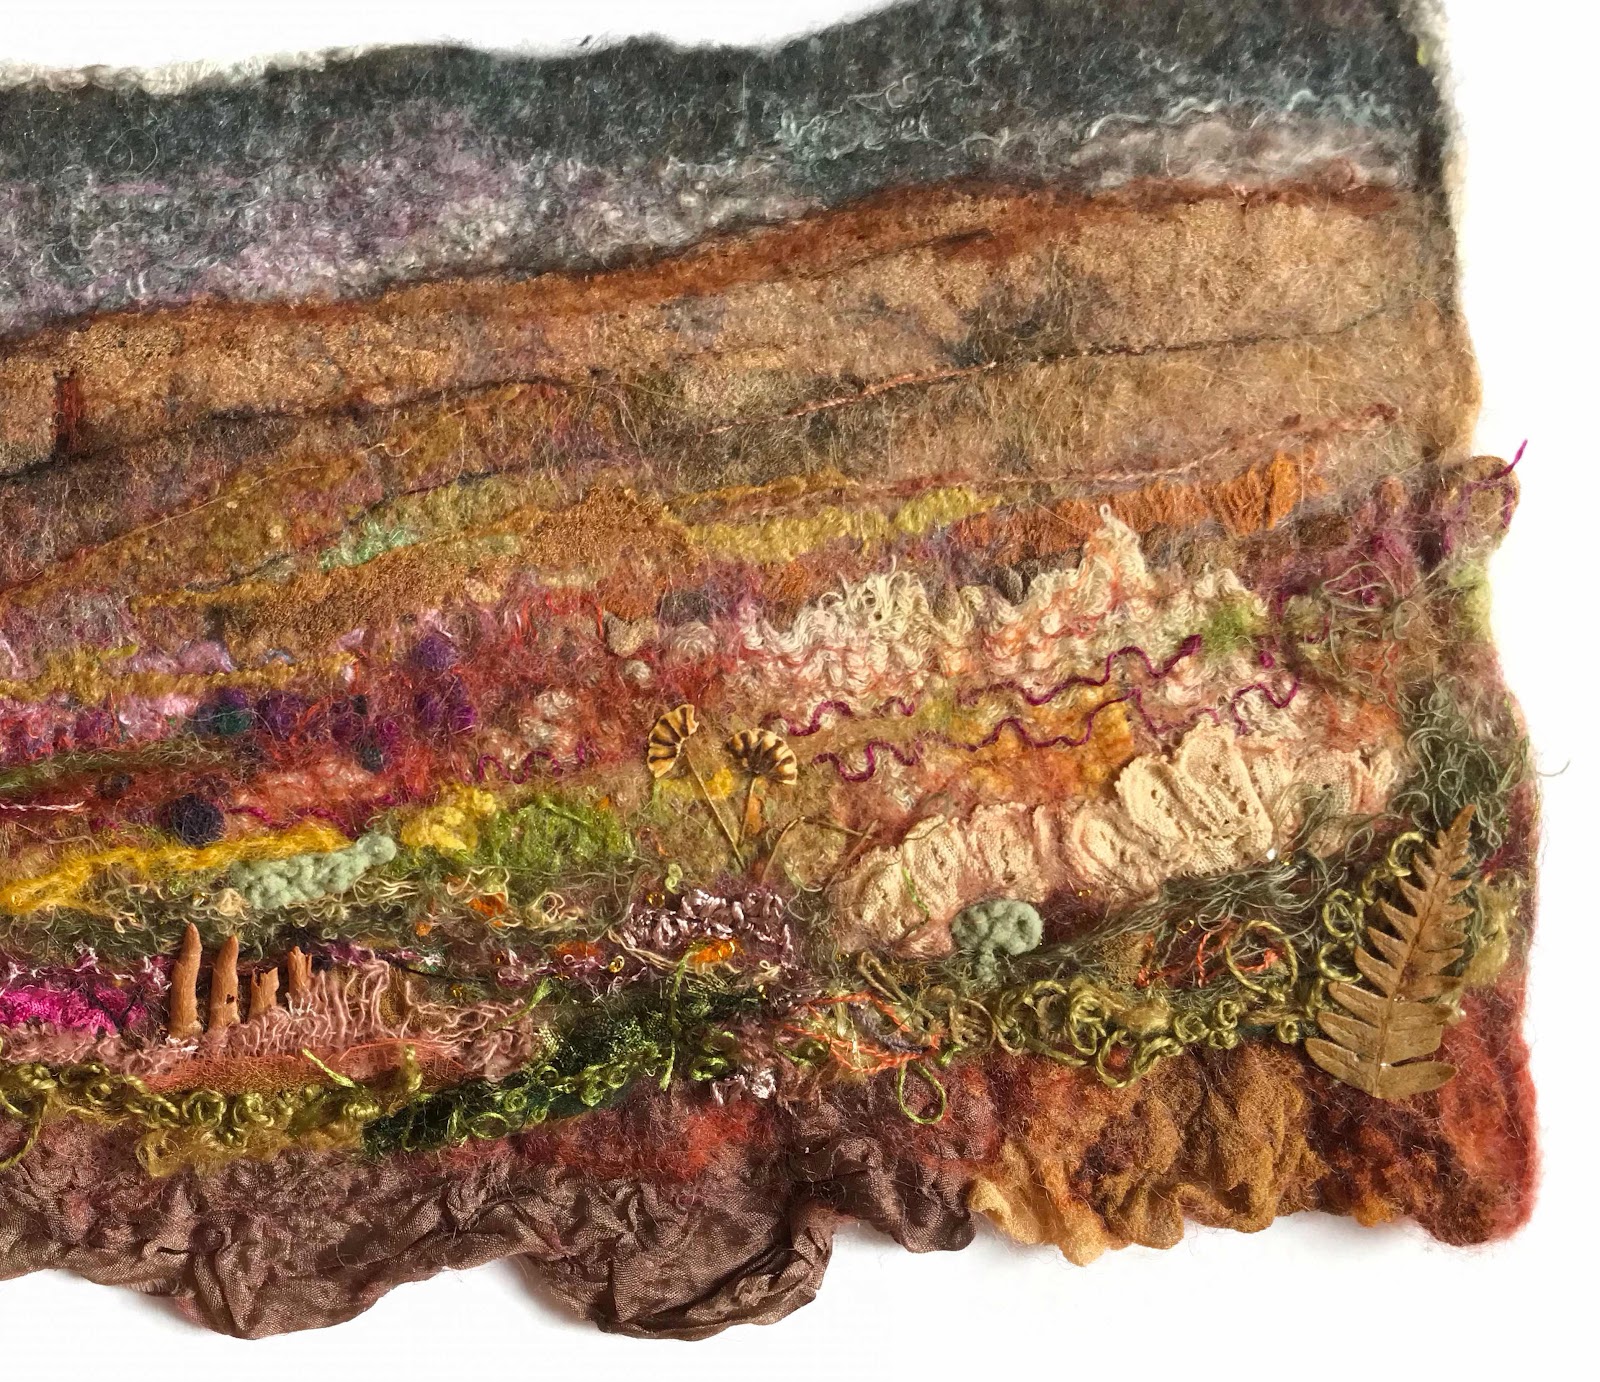
Following a couple of online workshops last year, I have learned how to give my edges a little more attention than I normally would. I’ve also made a couple of pictures, shown below, where the bottom edge is left very organic with silks that have been Nuno felted into the main piece…I really enjoyed that process and like the end result. Time will tell as to whether they sell!
(*update! Since starting this blogpost, the picture below, ‘Home to Roost’ has sold…which is brilliant news!)
The silk at the bottom gathers with the fine fibres during the felting process. The fibres work their way through the silk fabric and as the felt shrinks the silk ruches and creates that lovely ‘skirt’ on the bottom edge.
So what else could I do with my edges…
I have made a few samples to have a play around with ideas and to have some options to refer back to for future pieces when I feel like a more organic edge might work.
A ‘holey’ finish…a tideline perhaps? This was achieved by applying prefelted ‘rings’ onto the bottom with a silk chiffon layer underneath. Once fully felted, I snipped away the excess chiffon to leave the circles.
A loose, yarn border…nice way to use some of my stash of art yarns! Barely felted in to leave loops and waves along the bottom of the piece. Gives a nice organic edge…again, maybe a tideline?
This was a piece of crinkly cotton felted in along the bottom…the odd fine wool fibres latch on and gather it in places to create an undulating edge.
Looking at my ‘creative sparks’ squares, pieces of scrap felt added to slightly overhang the edge gives an option for a more geometric finish…maybe to give an impression of stones, boulders or cliffs, or as part of an abstract design…if placed side by side along the bottom edge, all slightly different sizes/lengths. They could even be added on any (or all) of the edges, not just the bottom. Above is a smaller piece of added felt, and there’s a longer piece in the picture below. I have a bag full of felt offcuts, and as long as you rough up the underside, it can still be incorporated into a new piece and should felt in successfully, but will stand a little proud of the main surface. That’s the great thing about felt…even the ‘failed’ pieces can be reused at some point.
There’s also a little ‘loop’ of yarn there in the picture above…maybe that could be executed all the way along an edge? Hmm…can you hear my imagination ticking?
Or of course the edges can just be worked to be left really even with lovely corners…slow, careful felting enables this, and whilst the edges below aren’t entirely perfect, the overall square shape could fit neatly, without trimming, into a box frame or floating frame…maybe without glass if thoroughly felted, and displayed like a canvas
The possibilities are endless really aren’t they?
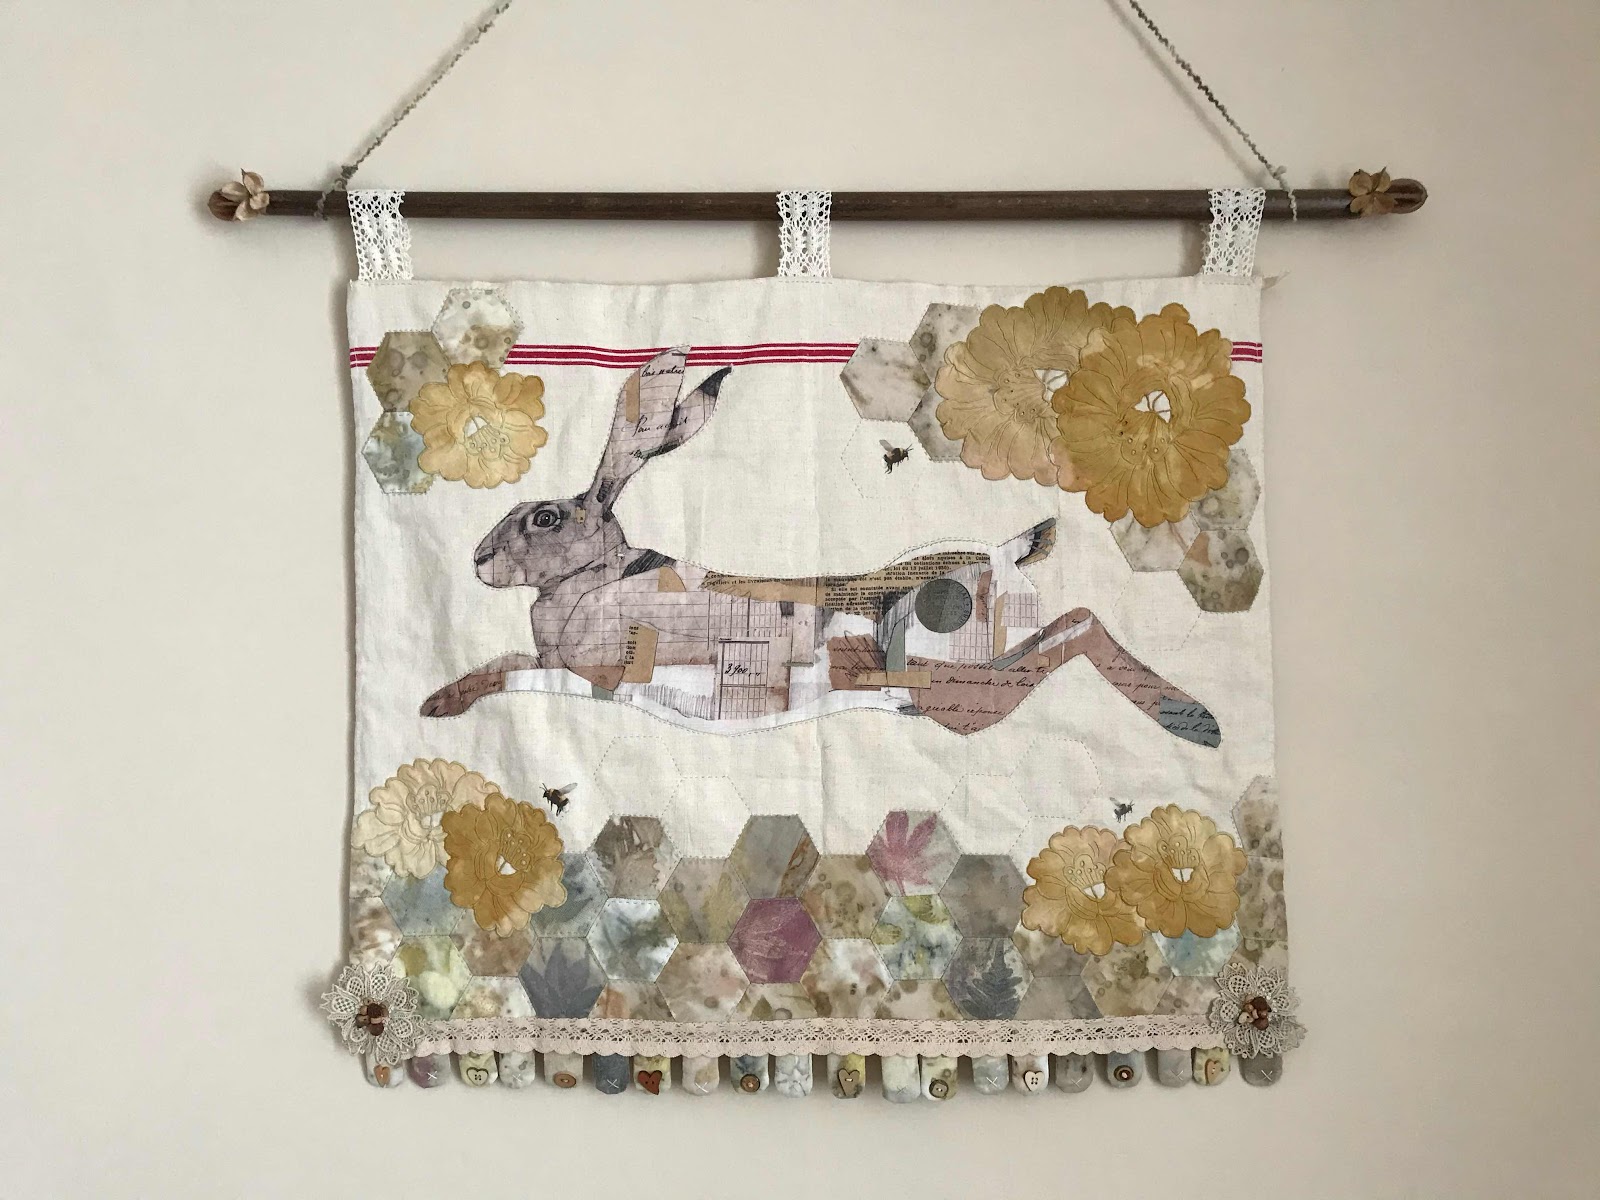
An alternative edge could be achieved by adding
- Beads
- Crochet
- Lace
- Shells
- Feathers
- Small found objects
Are you experimenting with anything creatively at the moment? I’d love to hear about it. All we need is an extra day in the week, right?!
So until next time, wishing you many happy and creative hours ahead…
Take care
x Tanya x